⚡ Quick Start
Get up and running with Design2Liferay in just a few steps. This guide assumes you've already installed the extension.
-
Open your Web Design in Chrome
- Launch the HTML/CSS design directly in Google Chrome.
- Ensure that the design is fully loaded and interactive.
-
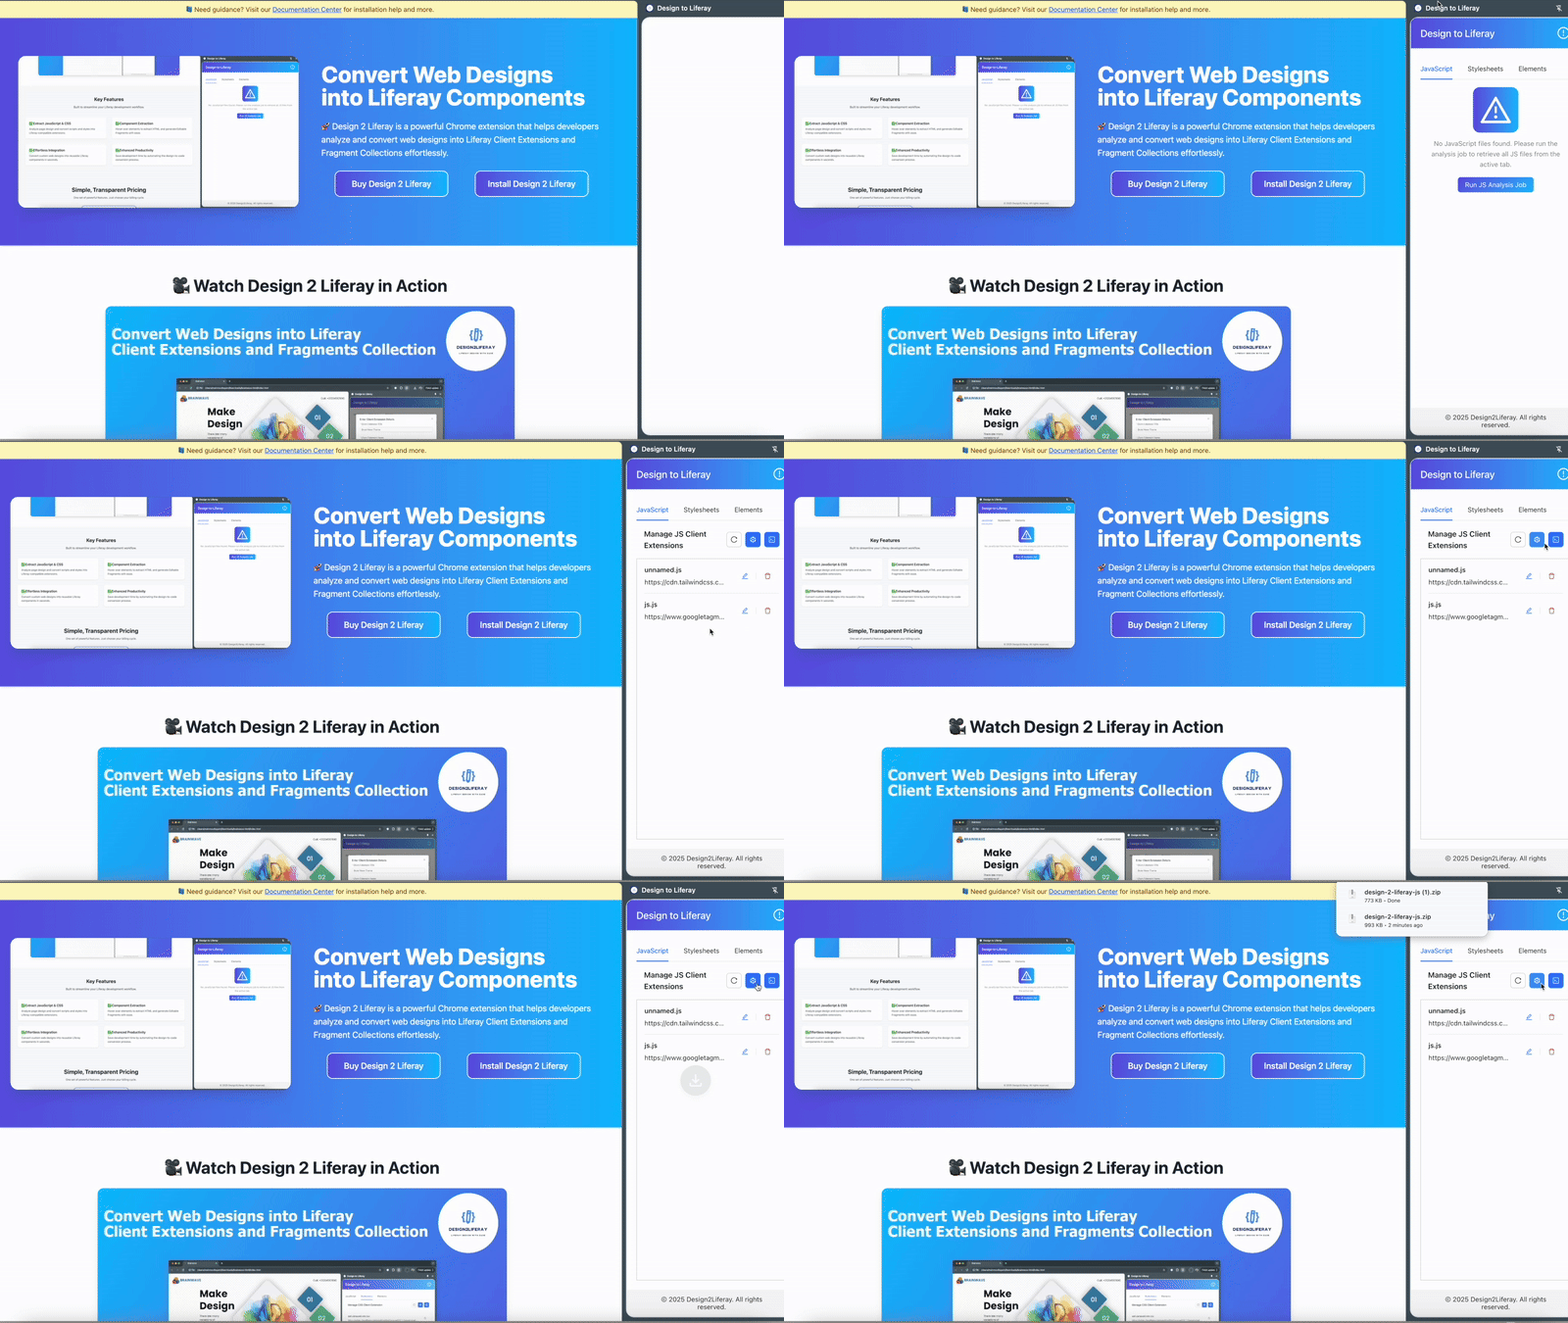
Open the Design2Liferay Extension
- Click the Design2Liferay icon in your Chrome toolbar.
- The extension side menu will appear with multiple tabs: JavaScript, StyleSheets, and Elements.
-
Generate JavaScript Client Extensions
- Navigate to the JavaScript tab.
- Click Run JS Analysis Job to scan and list JS files used in the design.
- Review each JS file and optionally rename the Client Extension name.
- Click Generate JS Client Extensions to download a deployable ZIP file.
- (Optional) Click Generate JS Client Extensions Project to download the full project files.
-
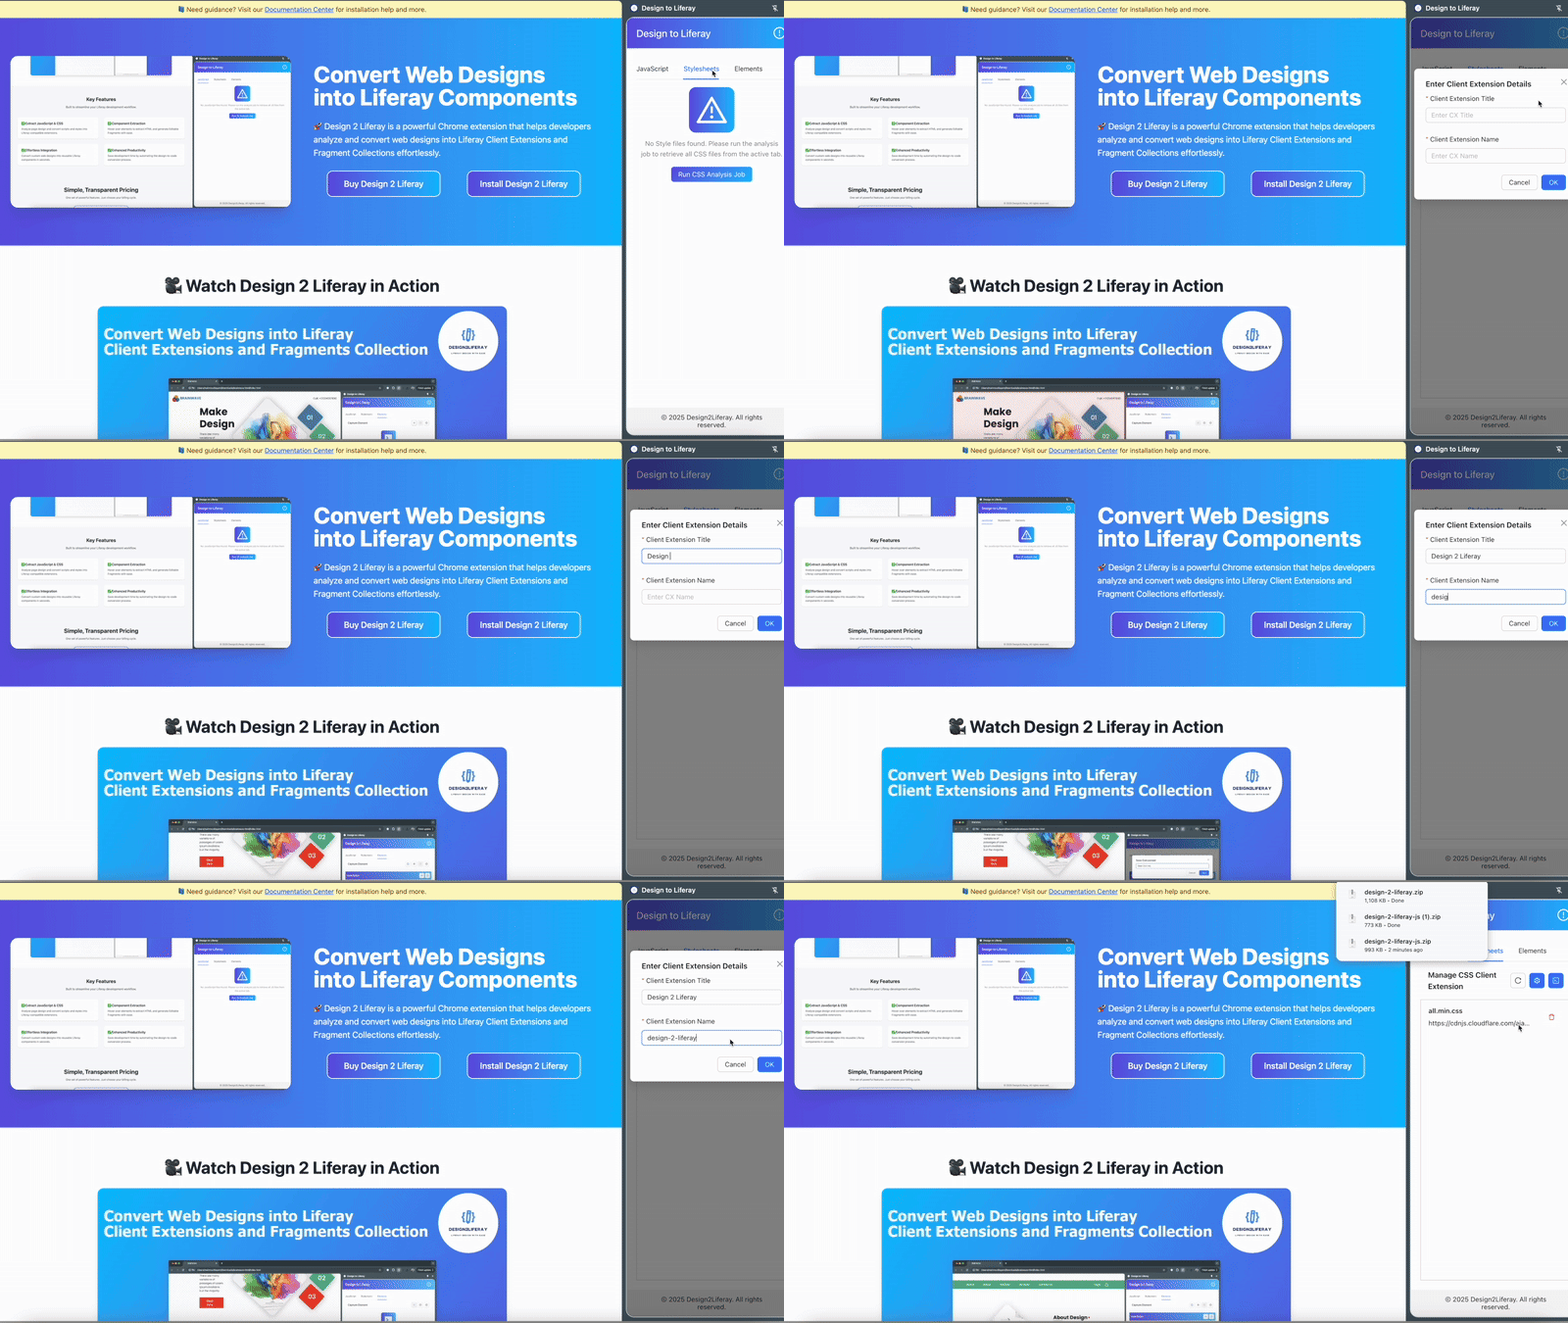
Generate CSS Client Extensions
- Navigate to the StyleSheets tab.
- Click Run CSS Analysis Job to analyze all CSS and embedded assets.
- Click Generate CSS Client Extensions to download a deployable ZIP file.
- (Optional) Click Generate CSS Client Extensions Project to get the full project source.
-
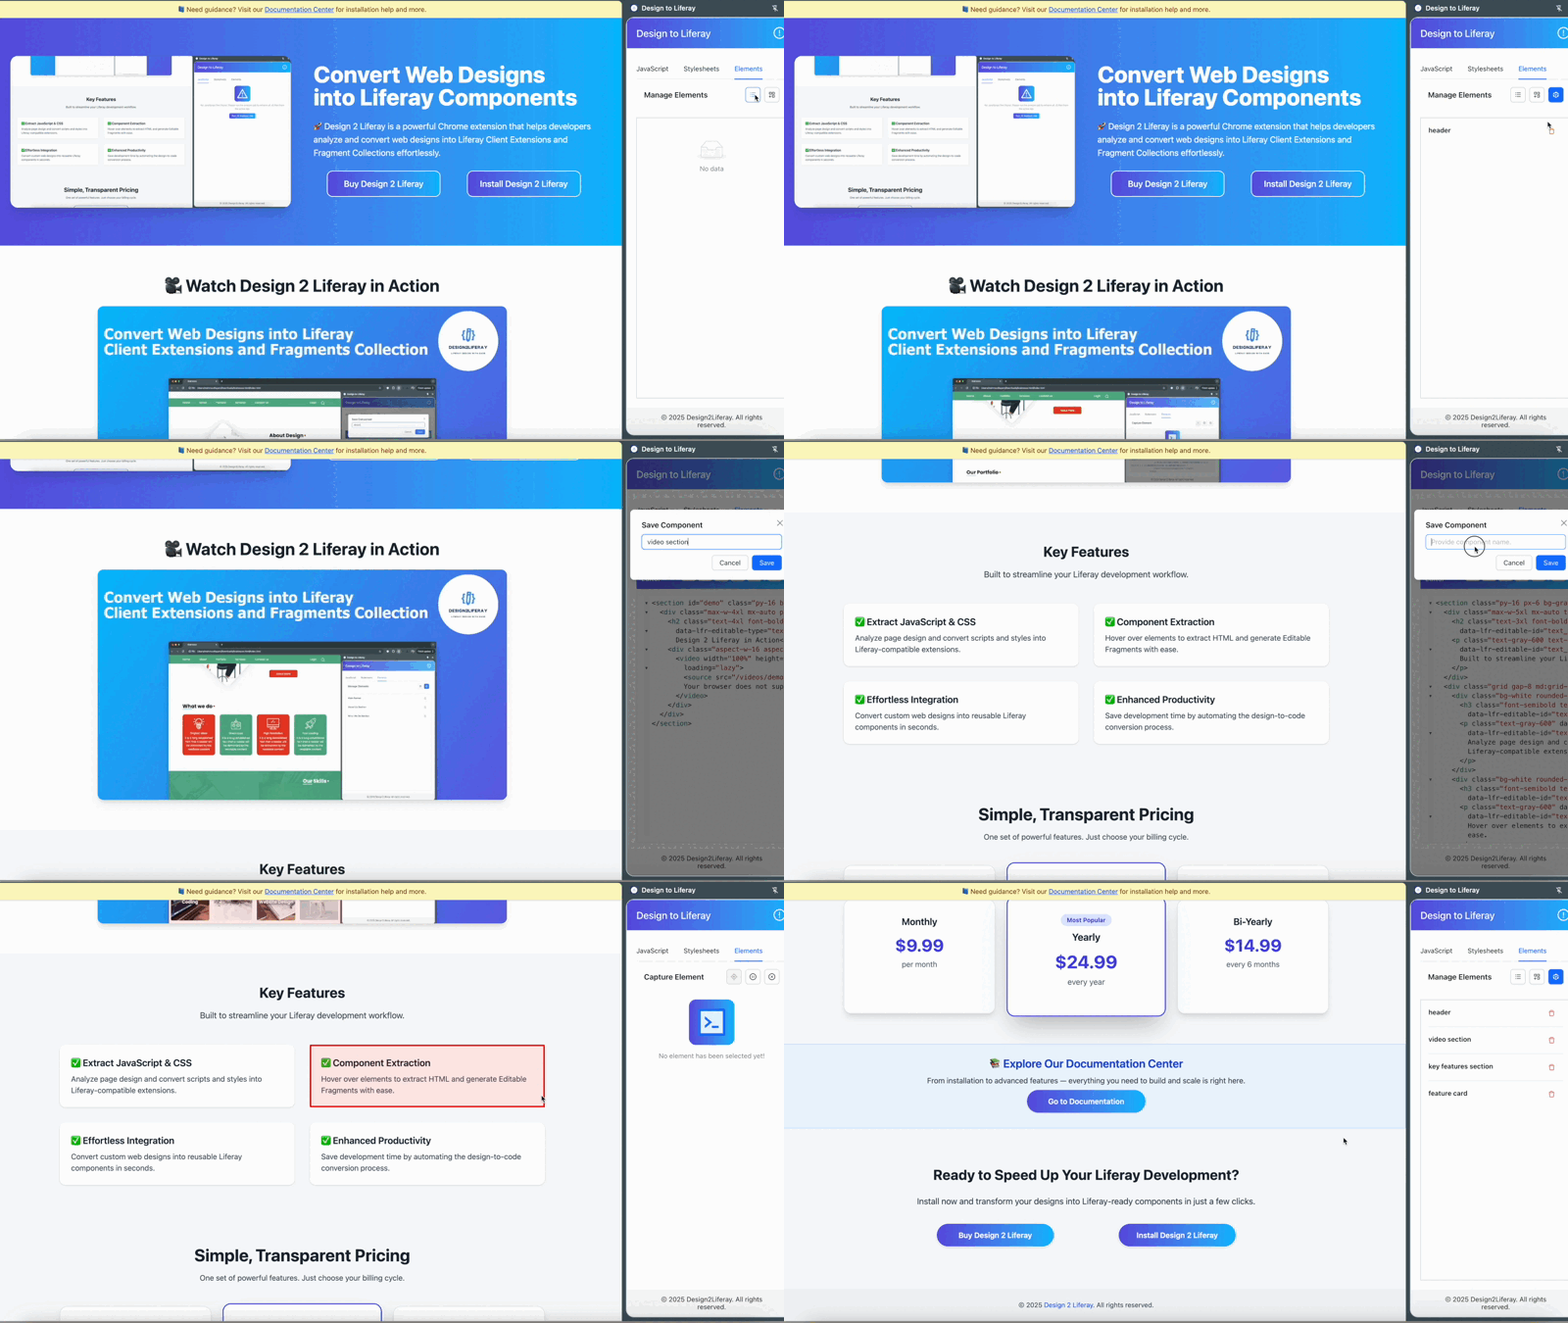
Generate Fragments and Fragment Collection
- Go to the Elements tab.
- Click Capture Element then Start Element Capturing.
- Select any element from the page to convert it into a Fragment.
- Repeat capturing for all desired elements.
- When done, click Generate Fragment Collection to download a ZIP file.
- Import the ZIP into your Liferay instance under Fragments.
💡 Tip:
To avoid style conflicts between your design and Liferay’s built-in CSS, Design2Liferay
automatically scopes your styles under the #wrapper element.
This ensures that your custom CSS rules won't unintentionally affect Liferay’s UI, and vice versa.
📌 Note:
If you're using custom tokens or CSS variables in your design, make sure to define them in your Liferay for style consistency.


